A Practical Guide to Turning Multi-View Images into 3D Model with AI
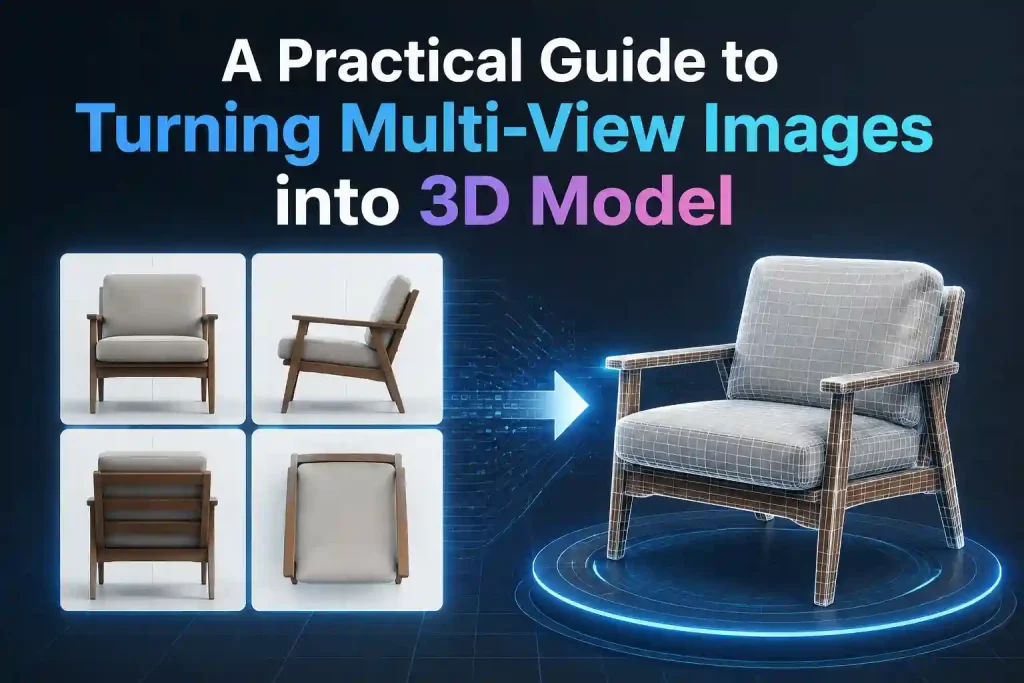
If you have ever generated a 3D model from a single image, you may have experienced the same little surprise: the front looks great, but the back looks like the AI had to improvise.
A logo may disappear. A handle may move. A character’s backpack may merge into their body. Sometimes the model looks perfectly reasonable from one angle and strangely mysterious from another.
The problem is not necessarily the AI. A single image simply does not contain enough information about a 3D object.
This is where turning multiple images into a 3D model comes in. Instead of asking AI to reconstruct an object from one view and guess everything else, you can provide multiple images of the same object from different angles. The AI can then use those views together to generate one more complete and editable 3D model.
So why does adding a few more images make such a difference? Let’s take a closer look.
What Is Multi-View Images to 3D?
How It Works
Creating a 3D model from multiple views is simple: give AI more views, and it has more information to work with.
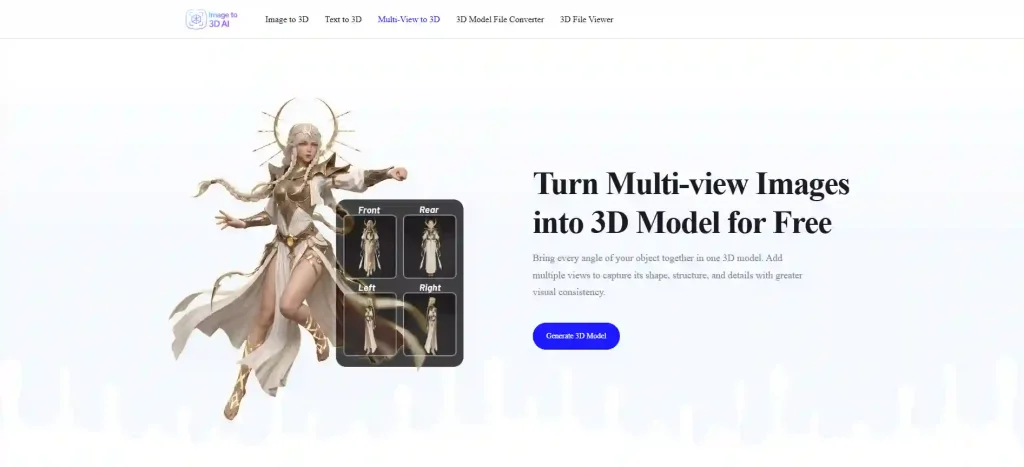
When you upload images of the same object from the front, back, left, or right, AI compares these views to understand what the object looks like from different angles.
For example, the front view may show the main design, while the back view reveals hidden details and the side views show the object’s depth and shape.
AI then combines the information from these images to create one complete 3D model, rather than generating a separate model from each image.
In simple terms:
More Views → More Information → Less Guessing → Better 3D Model
This is why multiple images can be especially helpful for objects with complex shapes, asymmetric details, or important features that aren’t visible from the front.
Single Image vs. Multi-View: What's the Difference?
| Dimension | Single Image | Multi-View |
|---|---|---|
| Front detail | Good | Good |
| Back and sides | AI's best guess | Read from your photos |
| Asymmetric details (logos, handles, text) |
Often lost or mirrored | Preserved accurately |
| Speed vs. completeness | Fast, but less complete | Slower, but more complete |
| Texture consistency across views | Can drift angle to angle | Consistent, matches your references |
| Best for | Symmetric or front-facing objects | Products, characters, anything viewed from all sides |
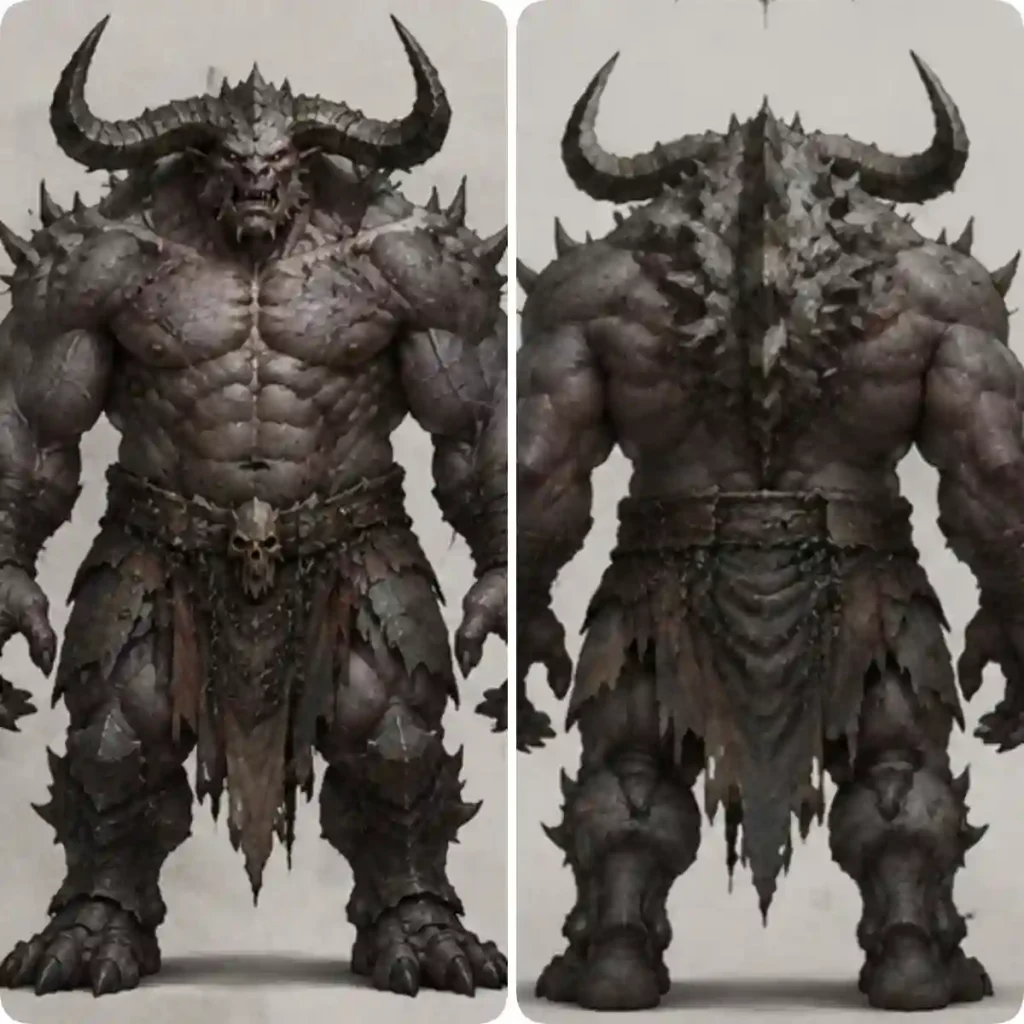


This does not mean multi-view is always necessary. If you only need a rough model or a simple object with an uncomplicated shape, one image may be perfectly sufficient.
But when the hidden sides matter, additional views can provide information that a single image simply cannot.
Multi-View Generation vs. Batch Generation
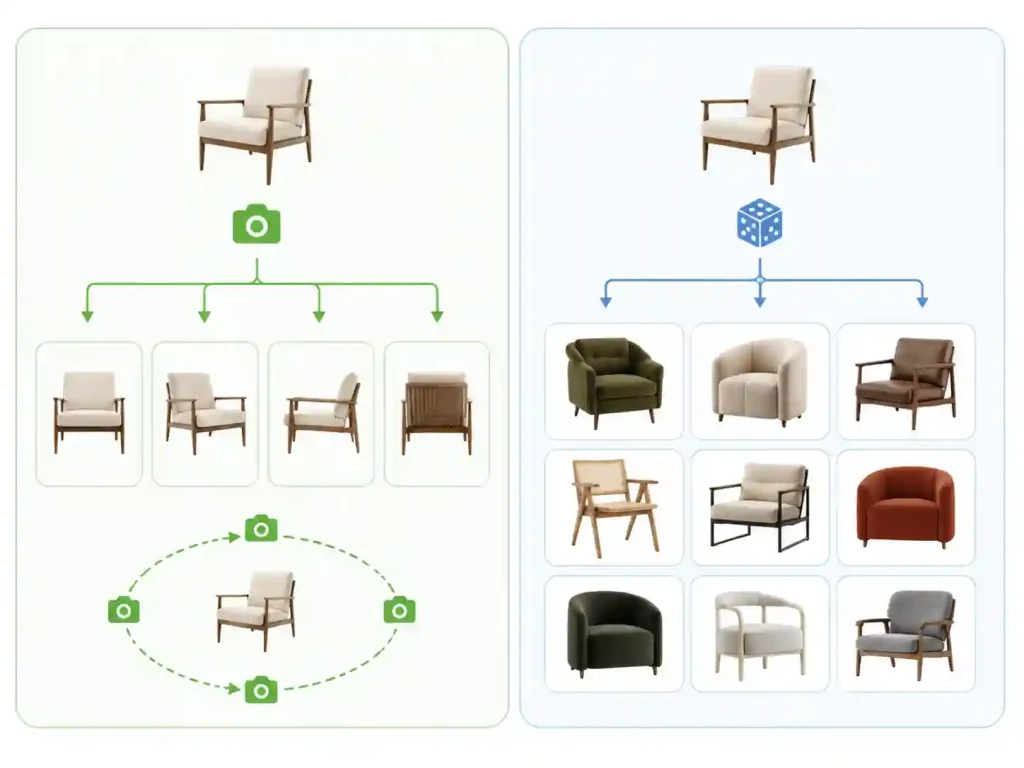
Multi-view generation:
Multiple images of one object → one 3D model
Batch generation:
Multiple images of different objects → multiple 3D models
For example, if you have front, side, and back images of the same chair, those images belong to one multi-view generation task.
If you have images of a chair, a lamp, and a table, and want a separate model for each, that is batch generation.
The simplest rule is:
Multiple views describe one object. Batch inputs describe multiple objects.
What Are the Main Benefits of Multi-View Image to 3D?
1. Backs and Sides: From Guesswork to Real Geometry
2. Asymmetric Details Are Preserved
3. Cross-View Texture Consistency
When geometry and texture are both rebuilt from the same reference set, the result is consistent across all views. Textures stay uniform from front to back, and the art style of your input images is preserved throughout.
This is especially powerful for stylized, anime, and hand-drawn assets. The multi-view to 3D generation maintains the look of your input art across every angle — so a character sheet with a specific art style produces a 3D model that matches that style from all sides, not just the front.
Higher texture resolutions keep text, patterns, and fine surface detail crisp from every viewing angle, rather than smearing or falling apart at the seams between views.
5. Near-Photogrammetry Accuracy at a Fraction of the Effort
Traditional photogrammetry delivers high accuracy but demands dozens of photos, controlled capture conditions, and specialized software. Multi-view generation approaches that level of detail with 1 to 4 images and a few minutes of processing.
The trade-off is creative freedom: multi-view has lower creative flexibility than text-to-3D or single-image generation, because the output is constrained by your reference photos. But when accuracy matters more than exploration, that constraint is a feature, not a bug.
6. Style Fidelity Across All Views
The multi-view to 3D generation preserves the art style of your input images across every angle. This makes it a strong fit for:
- Anime and stylized character designs
- Hand-drawn concept art and illustrations
- Existing renders with a consistent visual style
Text, repeating patterns, and logos render accurately from every angle instead of breaking down on unseen faces. The output looks like it was designed as a complete 3D asset, not a front view with AI-filled gaps.
How to Create a 3D Model from Multiple Images
In the following steps, we’ll use the multi-view to 3D model tool to turn multiple images of the same object into a 3D model. The process is straightforward and only takes three steps.
Step 1: Upload Multiple Views
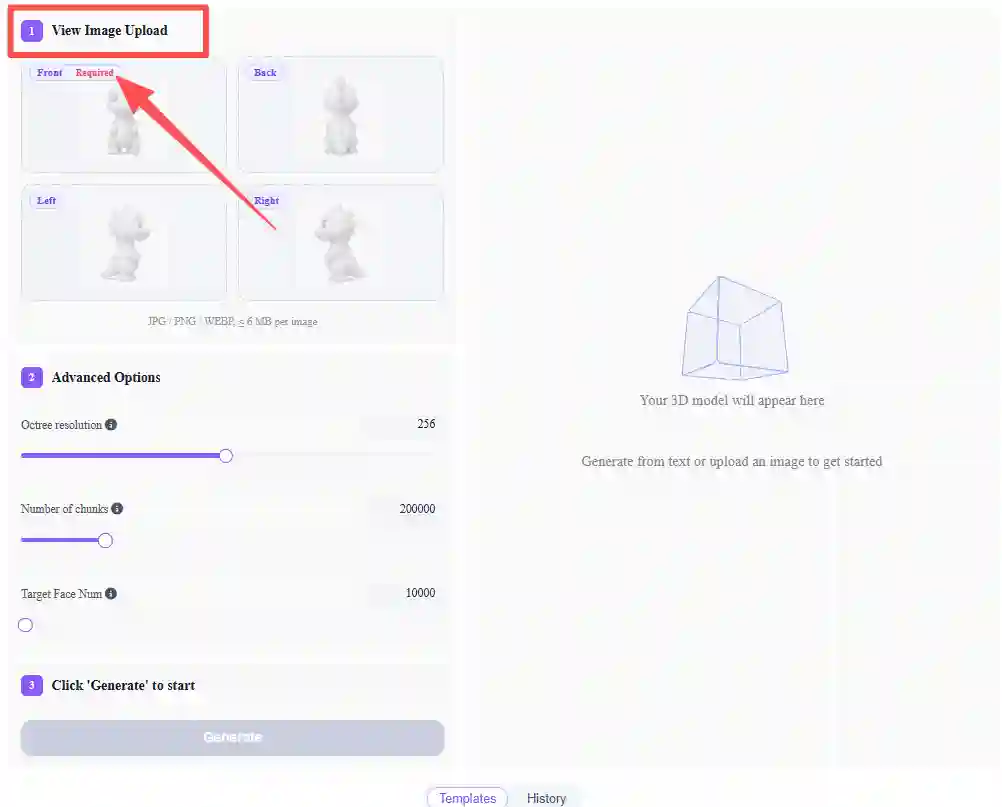
Upload images of the same object from different angles:
- Front — required
- Back — optional
- Left — optional
- Right — optional
The Front view is required as the primary reference. Additional views give the AI more information about the object’s shape, structure, and details, helping it create a more complete 3D model.
Step 2: Adjust Advanced Options
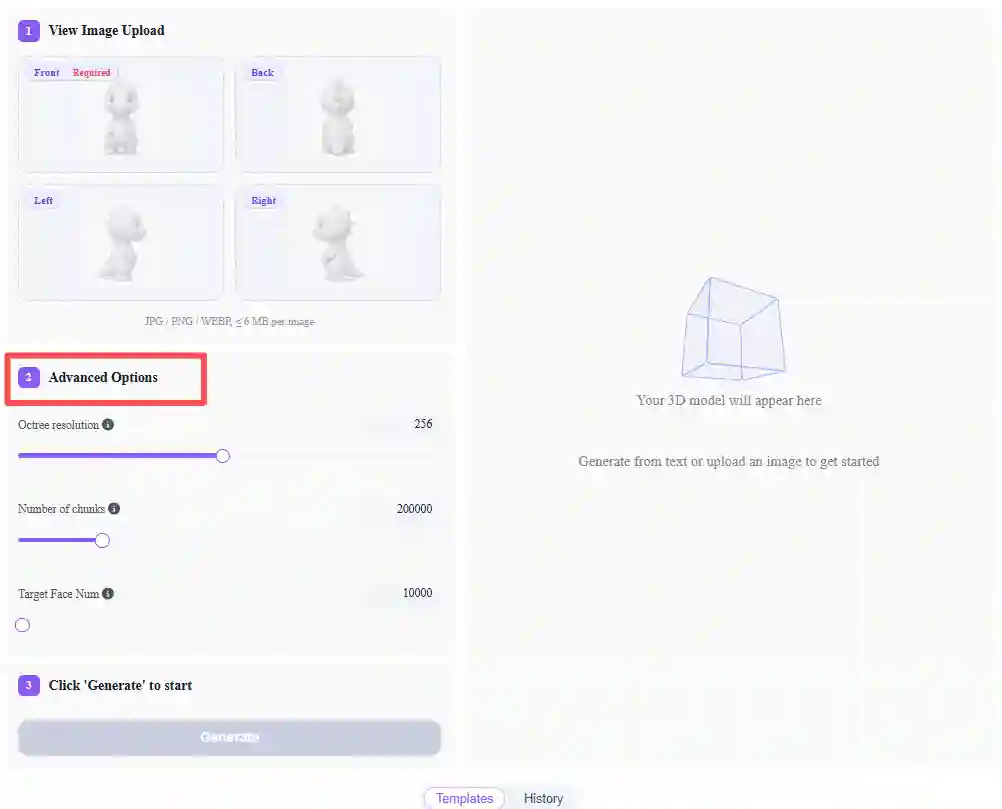
For more control over the generated model, expand Advanced Options and adjust:
- Octree Resolution — controls the resolution used during 3D reconstruction. Higher values can capture finer geometric details but may require more processing resources.
- Number of Chunks — controls how the reconstruction workload is divided during processing.
- Target Face Num — sets the target number of mesh faces, allowing you to balance model detail and mesh complexity.
If you’re not sure which settings to use, the default values are a good starting point. Advanced users can fine-tune these parameters based on their desired level of detail and mesh complexity.
Step 3: Generate and Preview
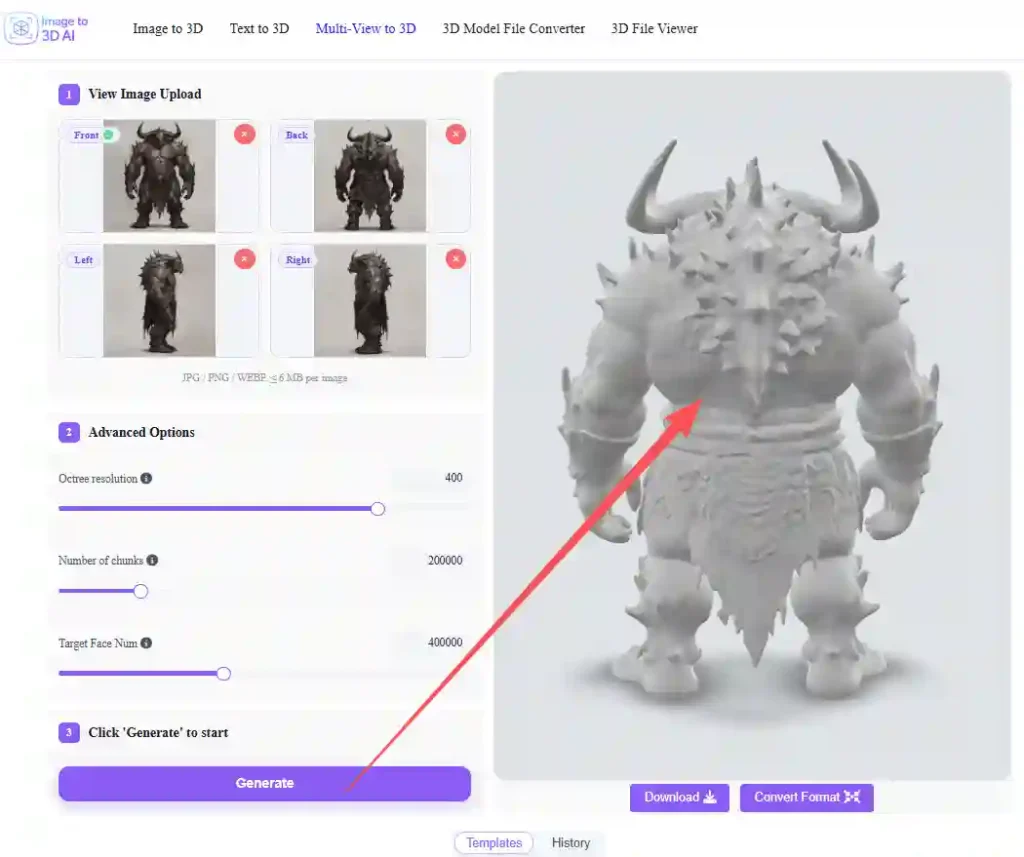
Click Generate to create the 3D model from your uploaded views.
Once generation is complete, preview the model from different angles to check its geometry, details, and overall appearance. If the result looks right, you can continue with your 3D workflow using the generated model.
Tip: You don’t need to upload every view. Start with the required Front image, then add Back, Left, or Right views when they provide useful information about parts of the object that aren’t visible from the front.
What Types of Images Work Best for Multi-View 3D Generation?
Best Fit for Multi-View
● E-commerce products — packaging, electronics, furniture: objects that need to be displayed from all angles with accurate details on every face
● Character assets — anime characters, game NPCs: models that need back-mounted equipment and animation-ready geometry
● Stylized and hand-drawn designs — character sheets, concept art: assets where the art style must stay consistent across every angle
● Vehicles and mechanical objects — cars, props, equipment: items with distinct front, side, and back designs
● Objects with asymmetric details — anything with logos, text, handles, or patterns that must appear correctly on multiple faces
Single Image Is Enough When
- The object is symmetric (a mug, a vase, a ball)
- You only need the front view for display
- You are doing quick prototyping and do not care about the back
- The object has no meaningful back-facing details
The simple rule: if the back or sides of your model matter, use multi-view. If they do not, single image is faster.
Advanced Tip: Generate Missing Views with AI
Sometimes you only have one image and no way to capture additional angles. The solution: use AI image editing tools to create the missing views from your existing reference.
Editing Character Poses
If you are creating a character for animation, start by adjusting the pose. Use an AI image editing tool to reposition the character into an A-pose or T-pose with arms away from the body.
Example prompt: “Place character in a frontal T-pose with open empty hands.”
Check if the result matches your desired pose. If not, refine the prompt and regenerate. The goal is a clean, symmetric pose with no overlapping limbs — this gives the 3D model clearly defined geometry that is ready for rigging.
Generating Additional Angles
Once you have a good front view in the right pose, generate the other angles:
- Start with your front-facing character in the optimal pose.
- Use the same AI editing tool to generate a back view — copy your previous prompt and change “front” to “back.”
- Repeat for side views, top views, or any other angle you need.
- Make sure all generated views share consistent proportions and style.
With front and back views (or front, side, and back), you have enough reference material for high-quality multi-view 3D generation.
Correcting Visual Errors
If any generated view contains visual errors — extra elements, distorted features, inconsistent styling — drag that image back into the AI editing tool as a reference and use a prompt to fix the specific issue.
Example: “Remove extra lights from the rear of the vehicle.”
Once you have at least three clean and consistent views, feed them into the multi-view 3D generation workflow.
Common Multi-View 3D Problems and How to Fix Them
| Symptom | Likely Cause | Fix |
|---|---|---|
| Back is missing detail or looks invented | No back-angle photo provided | Add a back view to your reference set and regenerate |
| Sides look mushy or smeared | Lighting or focus varied between views | Ensure consistent lighting and focus across all images |
| Proportions look uneven | Image proportions or scale inconsistent between views | Use images with matching aspect ratios and consistent object framing |
| Fine details got smoothed away | Resolution too low | Use higher resolution images (1040px or above recommended) |
| One side does not match the other (should be symmetric) |
Reference photos not shot at matching angles | Use a symmetric reference set or straight-on shots |
| Small parts look disconnected or floating | Object or accessory was partially hidden in a view | Ensure all parts are clearly visible in at least one angle |
| Text or logos appear mirrored or garbled | AI did not have a reference for that face | Provide a clear view of the face with the text or logo |
Final Thoughts: Give AI More to Work With
Single-image generation is incredibly useful because it turns one visual reference into a 3D starting point with almost no setup.
But one image has a hard limit: it can only show so much.
Using multiple images helps reduce this limitation by giving AI more views of the same object. Instead of relying heavily on inference to reconstruct hidden surfaces, AI can use these additional references to better understand the object’s shape, structure, proportions, and surface details.
The result is not simply “more images in, more data out.”
It is a better-informed reconstruction process:
More Views → More Visual Information → Less Guesswork → More Complete 3D Geometry → A More Useful Editable Model
So, if your single-image 3D model looks great from the front but gets a little creative when you turn it around, don’t immediately blame the AI. It may simply need to see the other side.
Create a more complete 3D model from multiple images and see how additional views can improve the final result!