The Ultimate Guide to UV Unwrapping for 3D Models
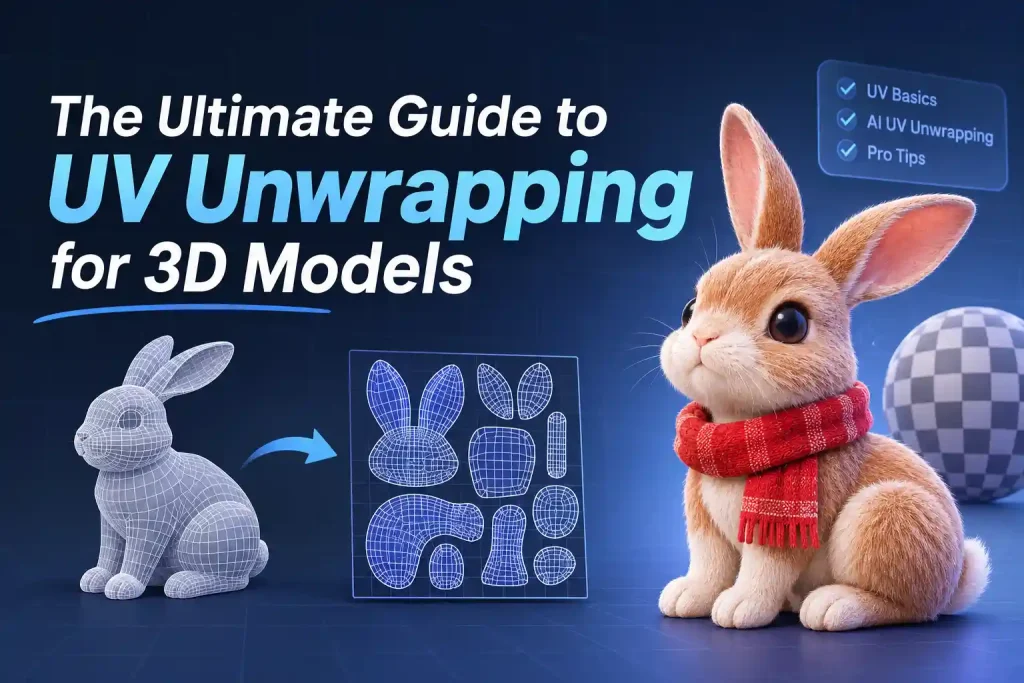
A detailed 3D model doesn’t always look as good once textures are applied. Patterns may stretch across curved surfaces, details can appear distorted, and visible seams may interrupt an otherwise polished design. In many cases, the problem isn’t the model itself, but how its surface is prepared for texturing.
That’s where UV unwrapping comes in. From manually organizing UV islands to using automated tools — including newer AI-powered UV generation — the right workflow can make a significant difference in texture quality and production efficiency. Whether you’re creating game assets, animated characters, or AI-generated 3D models, understanding UV unwrapping will help you get more consistent results.
What Is UV Unwrapping?
UV unwrapping is the process of flattening a 3D model’s surface into a 2D representation called a UV layout. This layout defines how a flat texture image is mapped onto the model, ensuring that each part of the texture appears in the correct position on the 3D surface.
Think of it like unfolding a cardboard box. The box is a three-dimensional object, but when you cut along certain edges and lay its surfaces flat, you get a two-dimensional pattern. UV unwrapping works in a similar way: it separates a model’s surface along selected edges and unfolds the resulting sections into a flat layout.
What Are UV Coordinates and UV Maps?
To understand UV unwrapping, it’s important to know how UV coordinates and UV maps work.
In 3D space, an object’s position is commonly described using three coordinates: X, Y, and Z. These coordinates define where points exist in three-dimensional space. However, a texture is a flat 2D image, so a different coordinate system is needed to describe how that image corresponds to the model’s surface.
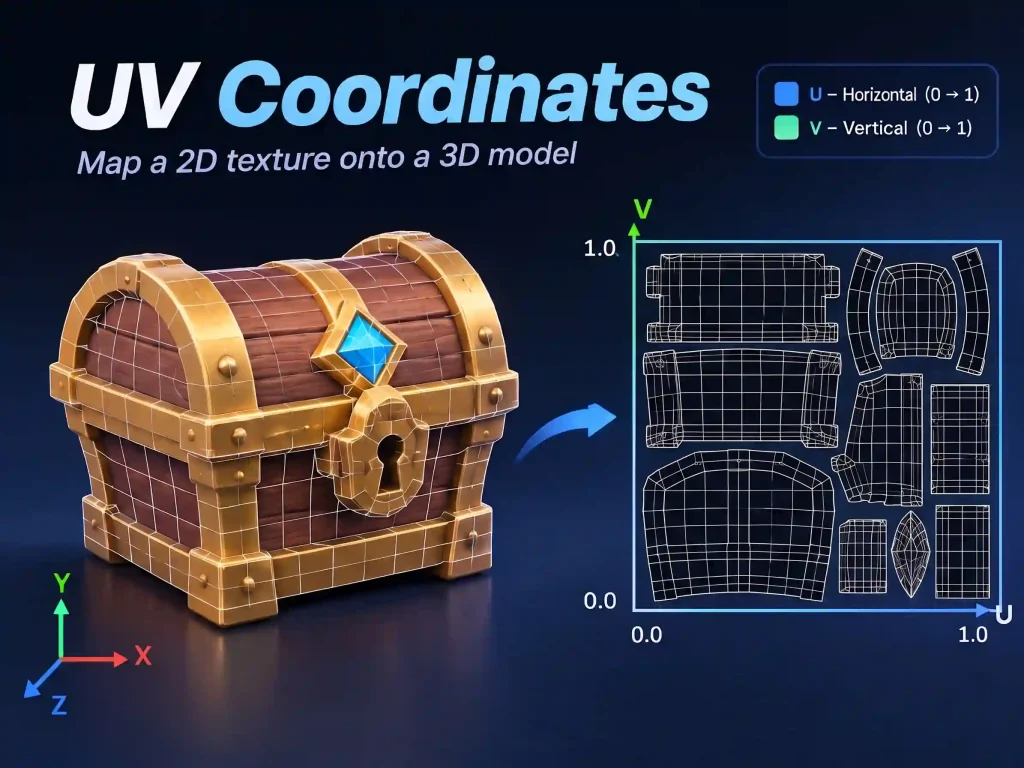
This is where U and V coordinates come in.
- U: Represents the horizontal position on a 2D texture.
- V: Represents the vertical position on a 2D texture.
Each point on a model’s surface can be assigned UV coordinates that identify the corresponding location on a texture image. In a typical normalized UV space, both coordinates range from 0 to 1, with (0, 0) representing one corner and (1, 1) representing the opposite corner. Some workflows also use coordinates outside this range for texture tiling or UDIM workflows.
A UV Map stores these texture coordinates and defines how the 2D image is applied to the 3D model. When a material uses a texture, the renderer uses the UV coordinates to determine which part of that image should appear on each surface.
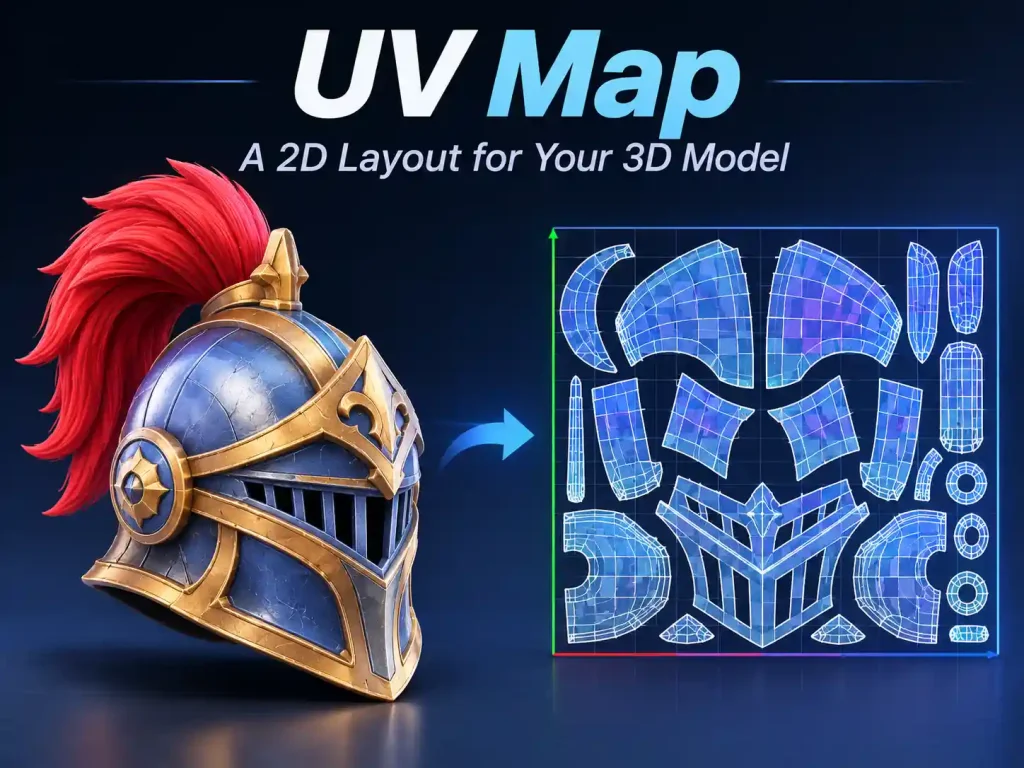
Several related terms are also important:
- UV Islands: Separate, connected sections of a model’s surface after it has been unfolded into 2D.
- Seams: Edges where the 3D mesh is split to create separate UV islands.
- UV Layout: The complete arrangement of UV islands within the 2D texture space.
Together, these elements determine how efficiently a model can be textured and how accurately its surface details will appear.
What Is AI UV Unwrapping?
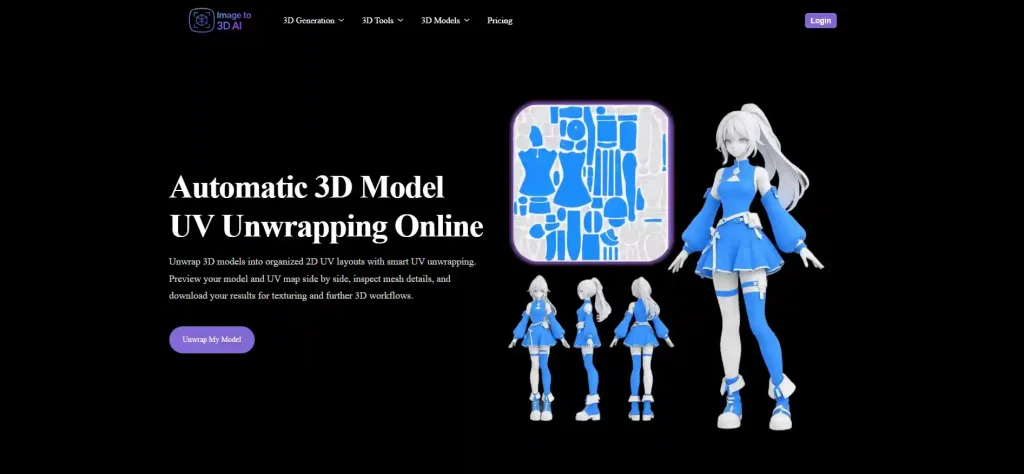
AI UV unwrapping uses AI-powered processing to automate the creation of UV coordinates and layouts for 3D models. Instead of requiring artists to manually mark every seam, unfold individual surfaces, and arrange UV islands, an AI-based tool can automate much of the preparation process.
Depending on the tool, this may involve analyzing mesh geometry, generating UV layouts, and organizing UV islands for texture application.
The main advantage is a simpler workflow. Artists can spend less time on repetitive UV preparation and more time working on textures, materials, and other aspects of 3D production.
AI UV unwrapping is particularly useful for AI-generated models, 3D assets, props, and models that need to be prepared for further texturing. However, automated results should still be inspected, especially when working on high-detail assets or projects with strict production requirements.
Why Is UV Unwrapping Important for 3D Models?
A 3D model can have excellent geometry and still look incorrect when textures are applied. Without a usable UV layout, a 3D application cannot reliably determine how a 2D image should fit across the model’s surface.
Proper UV unwrapping helps maintain texture quality, improve workflow efficiency, and prepare models for different production environments.
1. Accurate Texture Mapping
UV coordinates establish a direct relationship between a model’s surface and a 2D texture. This allows colors, patterns, labels, and other visual details to appear in their intended locations.
For example, when texturing a character, UV mapping helps ensure that clothing patterns, facial details, and other elements align correctly with the corresponding parts of the model.
2. Reduced Texture Distortion
Poorly arranged UV coordinates can cause textures to stretch, compress, or appear distorted.
A carefully created UV layout helps preserve the proportions of important surface details. This is especially important for models with curved surfaces, irregular geometry, or recognizable patterns.
3. Better Texture Resolution
UV unwrapping determines how much texture space is allocated to different parts of a model.
Efficiently arranged UV islands help make better use of the available texture resolution. This can improve the clarity of important details without unnecessarily increasing texture size.
Texel density is another important consideration. It describes how many texture pixels correspond to a given area of the 3D surface. Consistent texel density helps different parts of a model maintain a similar level of texture detail.
4. Support for Texture Painting and Baking
Many 3D texturing workflows depend on usable UV maps.
For example, texture painting requires a way to identify which areas of a 2D image correspond to specific parts of a model. Texture baking also relies on UV coordinates to transfer information such as color, normal, and ambient occlusion data onto texture maps.
Without properly prepared UVs, these processes can produce inconsistent or unusable results.
5. Compatibility with Different 3D Workflows
UV maps are widely used in game development, animation, visual effects, product visualization, and other 3D applications.
A well-prepared UV layout makes it easier to transfer models between different tools and production stages, reducing the need for additional texture preparation.
Manual UV Unwrapping vs. Automatic UV Unwrapping
| Comparison |
Manual Manual UV Unwrapping |
Auto Automatic UV Unwrapping |
|---|---|---|
| Workflow | Manual seam placement and UV adjustment | Automated UV generation |
| Processing Time | Usually longer | Usually faster |
| Control | Detailed manual control | Depends on the algorithm |
| Technical Skill | Requires UV knowledge | Generally easier to use |
| Best For | Detailed and production-specific assets | Faster processing and general-purpose models |
How Does UV Unwrapping Work?
Traditional UV Unwrapping Workflow
A typical manual or traditional UV workflow includes several steps.
Step 1: Prepare the 3D Mesh
Before unwrapping, check that the model has a usable mesh structure. Remove unnecessary geometry, inspect the surface, and make sure the model does not contain obvious mesh problems.
Step 2: Mark Seams
Seams define where the mesh will be separated during the unwrapping process. Artists usually place them along less visible edges or natural boundaries to minimize visible texture breaks.
Step 3: Unwrap the Mesh
Once the seams are defined, the software unfolds the selected surfaces into 2D UV islands. Different algorithms may prioritize preserving angles, edge lengths, or other geometric properties.
Step 4: Adjust UV Islands
The resulting islands may need additional adjustments to reduce stretching and improve their overall shape. This process is often called UV relaxing.
Step 5: Pack UV Islands
The UV islands are arranged within the available texture space. Good packing aims to maximize usable space while maintaining appropriate margins and avoiding unwanted overlaps.
Step 6: Apply and Test Textures
Finally, apply a checker texture or material to the model to inspect the UV layout. Look for stretching, distortion, visible seams, and inconsistent texture resolution before moving on to detailed texturing.
AI UV Unwrapping Workflow
AI UV unwrapping simplifies many of these steps by automating the generation of UV layouts.
While the exact process varies between tools, a typical workflow looks like this:
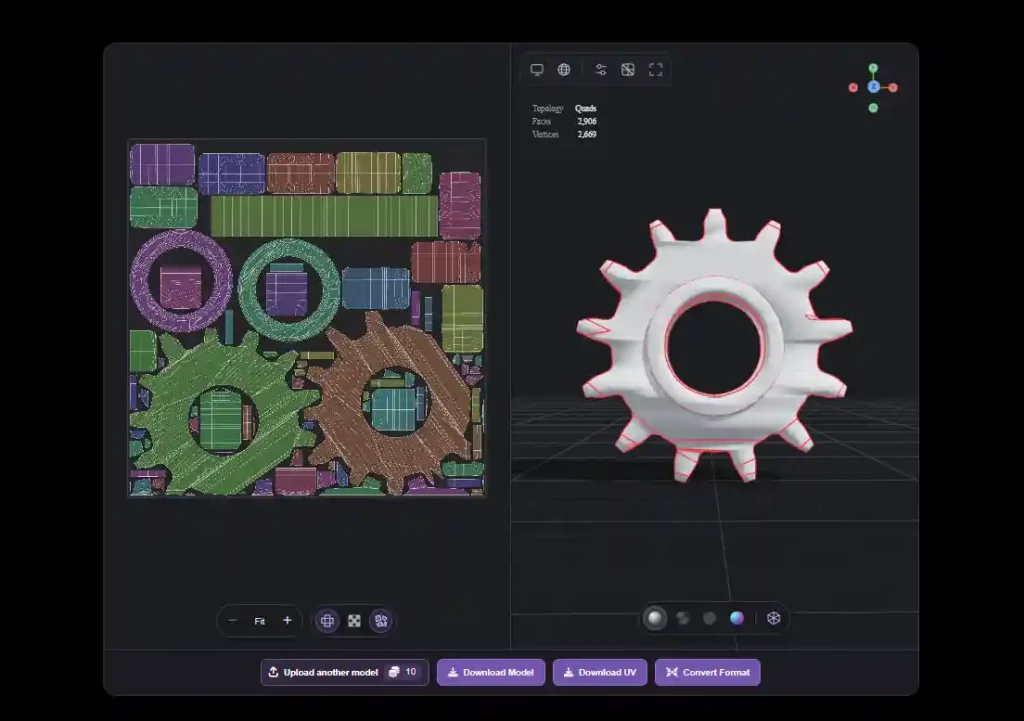
Step 1: Upload a 3D Model
Import the model into an AI UV unwrapping tool. Make sure the file is supported and the mesh is suitable for processing.
Step 2: Generate UV Coordinates Automatically
The AI-powered system processes the model and generates a UV layout, reducing the need for manual seam placement and individual island adjustments.
Step 3: Preview the UV Layout
Inspect the generated result to check the island arrangement, possible stretching, overlaps, and overall texture space utilization.
Step 4: Download the Unwrapped Model
Export the processed model and continue working in your preferred 3D software or texturing application.
For artists who want to simplify this process, an online AI UV unwrapping tool can provide a more direct way to prepare models for texturing without managing every step manually.
Common UV Unwrapping Problems and How to Fix Them
| Common Problem | Possible Cause | How to Fix It |
|---|---|---|
| Texture Stretching | UV islands are distorted or have incorrect proportions. | Adjust UV islands, apply UV relaxing, or review seam placement. |
| Overlapping UVs | Multiple UV islands occupy the same texture space unintentionally. | Reposition overlapping islands or regenerate the UV layout. |
| Poor UV Packing | UV islands are arranged inefficiently, leaving too much unused space. | Optimize island rotation, scaling, and packing. |
| Visible Texture Seams | Seams are placed in noticeable areas or textures do not blend properly across island boundaries. | Adjust seam placement and check texture padding and baking settings. |
| Uneven Texel Density | Different model surfaces receive inconsistent amounts of texture space. | Adjust UV island scaling to maintain more consistent texel density. |
Conclusion
UV unwrapping is a prerequisite, not a finishing step. Once a model has a usable UV layout, everything downstream — texture painting, baking, and material work — builds on it. And when a texture looks wrong later, the cause almost always traces back to a seam, an island, or how much texture space that area received.
This matters most for AI-generated models. AI texture tools apply materials to the UV layout a model already carries; they don’t rebuild or re-unwrap it. If you’re starting from an image, verify that the model has usable UVs before texturing, and handle retopology and LOD before it goes into an engine.